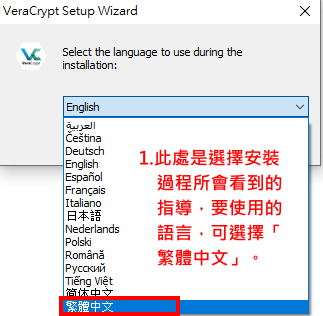
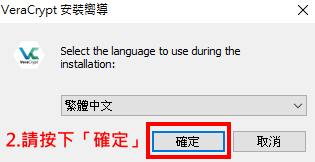
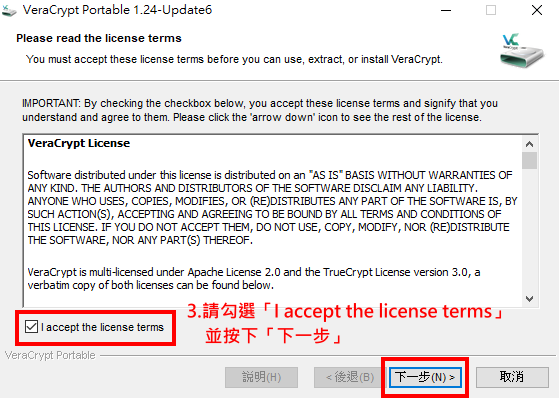
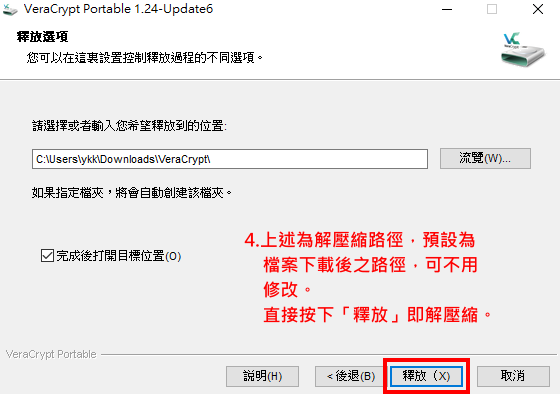
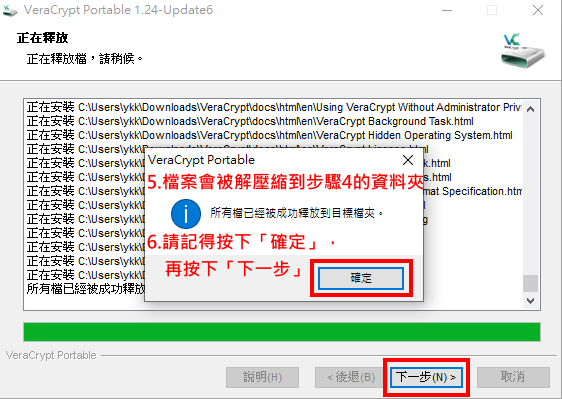
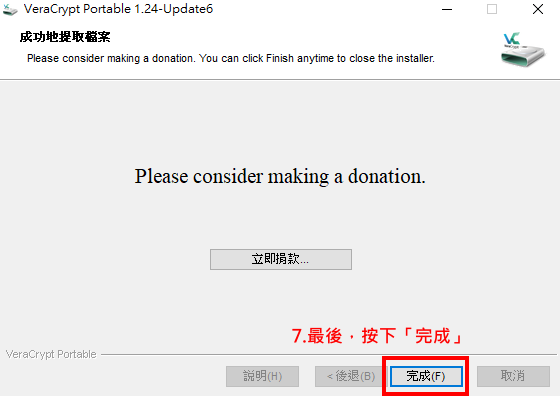
硬碟隨身碟加密-VeraCrypt軟體教學
出自KMU Wiki
(修訂版本間差異)
| 在2020年6月7日 (日) 12:18所做的修訂版本 (編輯) Ykk (對話 | 貢獻) ←上一個 |
在2020年6月7日 (日) 12:53所做的修訂版本 (編輯) (撤銷) Ykk (對話 | 貢獻) 下一個→ |
||
| 第33行: | 第33行: | ||
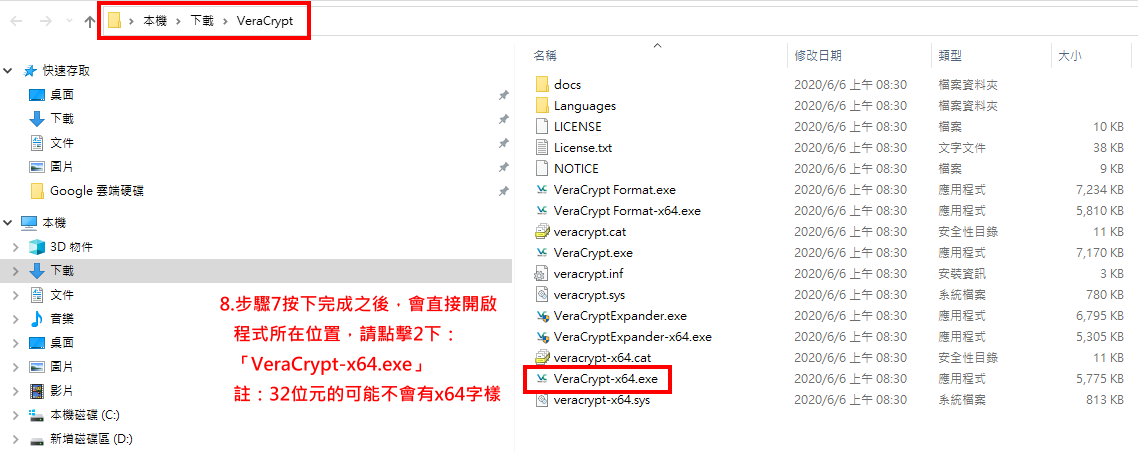
| : 註:32位元的可能不會有x64字樣 | : 註:32位元的可能不會有x64字樣 | ||
| ::[[Image:vera_07.png]] | ::[[Image:vera_07.png]] | ||
| + | <br/> | ||
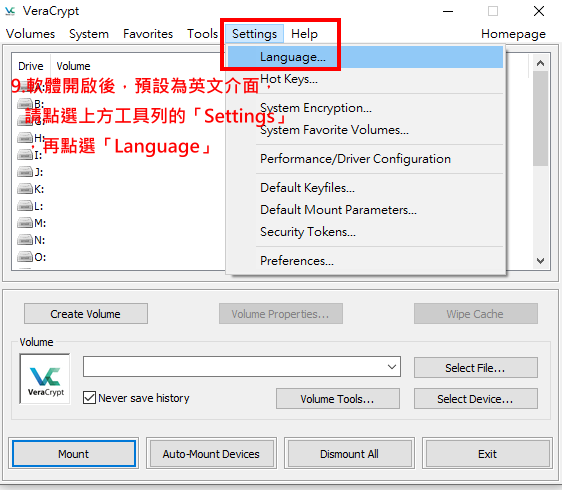
| + | :9.軟體開啟後,預設為英文介面,請點選上方工具列的<font color="red">「Settings」</font>,再點選<font color="red">「Language」</font>。 | ||
| + | ::[[Image:vera_08.png]] | ||
| + | <br/> | ||
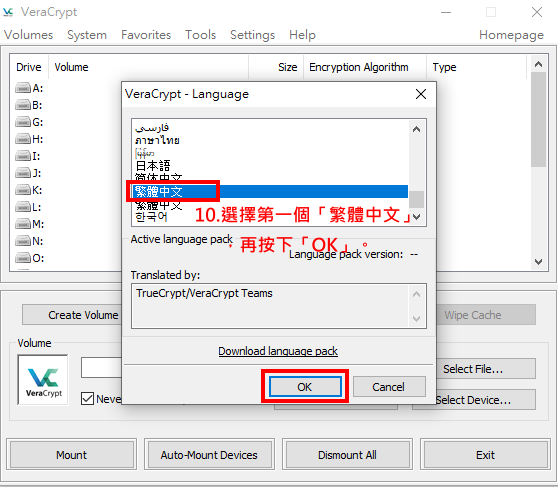
| + | :10.選擇第一個<font color="red">「繁體中文」</font>,再按下<font color="red">「OK」</font>。 | ||
| + | ::[[Image:vera_09.png]] | ||
| + | <br/> | ||
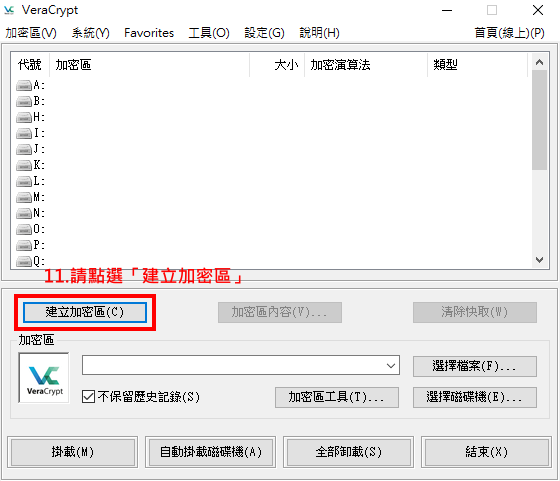
| + | :11.回到軟體操作介面,請點選<font color="red">「建立加密區」</font>。 | ||
| + | ::[[Image:vera_10.png]] | ||
| + | <br/> | ||
| + | :12.請點選<font color="red">「加密非系統分區/驅動器」</font>,之後點選<font color="red">「下一步」</font>。 | ||
| + | : 加密區類型,請點選<font color="red">「標準VeraCrypt加密區」</font>,之後點選<font color="red">「下一步」</font> | ||
| + | ::[[Image:vera_11.png]] | ||
| + | <br/> | ||
| + | :13.請點選紅框處的<font color="red">「選擇磁碟機」</font>,確認選到<font color="red">「可移除式磁碟」</font>的正確隨身碟。,之後點選<font color="red">「確定」</font>。 | ||
| + | : 確認磁碟機路徑無誤後,點選<font color="red">「下一步」</font> | ||
| + | ::[[Image:vera_12.png]] | ||
| + | <br/> | ||
| + | :14.回到軟體操作介面,請點選<font color="red">「建立加密區」</font>。 | ||
| + | ::[[Image:vera_13.png]] | ||
| + | <br/> | ||
| + | :15.回到軟體操作介面,請點選<font color="red">「建立加密區」</font>。 | ||
| + | ::[[Image:vera_16.png]] | ||
| + | <br/> | ||
| + | :11.回到軟體操作介面,請點選<font color="red">「建立加密區」</font>。 | ||
| + | ::[[Image:vera_10.png]] | ||
| + | <br/> | ||
| + | :11.回到軟體操作介面,請點選<font color="red">「建立加密區」</font>。 | ||
| + | ::[[Image:vera_10.png]] | ||
| <br/> | <br/> | ||
| + | |||
| == 如何使用加密後之硬碟或隨身碟 == | == 如何使用加密後之硬碟或隨身碟 == | ||
在2020年6月7日 (日) 12:53所做的修訂版本
目錄 |
前置準備
- 1.請至VeraCrypte官網進行下載,此為免費開源軟體
- 2.此軟體有免安裝版本,如有需要,可自行選擇下載使用。
- 3.以下教學使用Windows 10 作業系統為範例,使用版本為 For Windows,
- Portable version: VeraCrypt Portable 1.24-Update6.exe (Tuesday March 10, 2020)
- 註:此軟體不同於BitLocker僅能於Windows使用,此軟體支援macOS,Windows,Linux等
如何使用加密功能
